2014-02-19 White Balancing, Exposure and Illumination in Swimming Pool
(Currently this article is only in English)
These tests are preparations for a larger project where we plan to shoot video in a swimming pool environment during about ten sessions with multiple cameras.
Shooting a series causes additional needs for continuity, repeatability and uniformity. Initially one might think that everything can be fixed in post during the edit. To a certain extent this might be true. But in practise, you end up in a very large number of tweaks here and there causing additional work and loss in video quality.
We considered the possibility of 14-bit video, but, for this project it would not have been feasible. Consequently, we are limited to 8-bit video from DSLR and video cameras. If you expose the video extremely carefully, you might be able to get 230 different numeric pixel values of exposure. If you need to do larger adjustments in post, you’ll be converting this range up and down and effectively using maybe 100 numeric pixel values, i.e. 6 or 7 bits of data per color channel. Add on top of this compression artefacts during record, after edit and perhaps further compression during distribution, the discontinuity and stepping of pixel values easily become exagerrated and appear as increased noise and various artefacts especially on graded surfaces. These artefacts might not disturb that much on a good quality monitor. But, if you add a final weak link of a cheap large screen that is capable of reproducing only 6 bits per color channel, the final image on the screen might be below par.
Repeatability of recording is important. We plan to shoot multiple sessions with multiple cameras and it is likely that atleast some clips will be edited together from separate sessions. Also, there might be a need to reshoot something from a previous session. The swimming pool sessions are limited to one hour or 1.5 hours max and there is no possibility of reviewing the multicamera shots during the swimming pool session.
White Balancing
Repeatability is fairly straightforward with all settings that can be set numerically. Thus we thought that we could try numeric Kelvin values for white balancing and then select values that would give similar results on different cameras. During the first tests we were not able to achieve pleasing imagery with any of the values. Auto white balance gave visually more pleasing results. But, how could we be sure about repeatability and uniformity? This lead us to the final choice of performing manual white balancing. If the manual white balancing is done always in the same way, it should give fairly coherent results.
Now we only have to find out the best basic setting for manual white balancing in a swimming pool environment. Half of the swimming is shallow, about 1.5 meters deep, and half is deeper, with a ramp in between. Obviously the “correct” white balance cannot really be the same for both ends. However, needing to set the white balance multiple times on multiple cameras during the same swimming pool session is error prone.
Thus we need to set the white balance in repeatable manner. Our current working assumption is to use the same 1m2 square area for all the sessions. Currently we are trying to determine the best location. In the text below, we have been experimenting with manual white balancing of 1m2 of the white tiling at the top of the pool ramp (between shallow and deep) and 1m2 of the white tiling at the bottom of the ramp, but excluding the pool floor. Compared to pool walls or floor, the ramp should be a better surface for white balancing, because it averages direct light from above and indirect (bluer) light from the side. Additionally, there is a smaller risk that the camera man would cast a shadow on the surface during measurement.
White balancing in the swimming pool is a very delicate operation. If the colors are slightly too warm, the tiling and water will look brownish thus giving a repulsive thoughts of the environment. On the other hand, bluer tones are fresher and suitable for diving related activities, but, skin tones with a blue cast might look unhealthy.
Luckily, the artificial pool lighting is created by a large number of lamps. Thus we have not observed any flickering whilst using exposure times of 1/50 second. This would have interfered with the repeatability of manual white balancing as well.
Highlight, Color and Shadow Tones
During the very first swimming pool session we noticed the difficulty of getting any details in the black diving suits. Obviously techy fashionable black gear underwater might not be the most photogenic and one will have to consider other colors, if possible. Reproduction of details in the shadow tones is a challenge, especially at the deep end of the pool, and, we are attempting to atleast measure and observe it. One solution might be additional illumination.
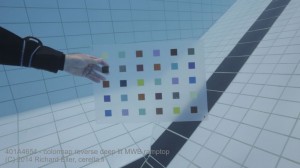
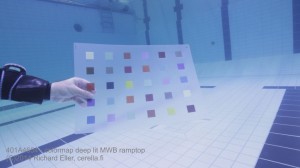
Color reproduction, especially skin tones, is another thing we are trying to optimize. Since we did not have any u/w color charts available (there actually would have been a chart from Amphibico), we resolved this by using an office decoration by IKEA. This plastic decoration has multiple patches of mixed color tones with fairly subtle differences. Since we are not professional color graders, these subtle differences are extremely useful for estimating accuracy of color reproduction. I believe that they may even be better than a traditional basic color chart. And, by flipping the “colormap” to its reverse side, you can try to record paler versions of the mixed colors, a task even more difficult.
Gear
Our team has a mixed set of camera gear:
- Canon 5D Mark III
- Sony MC50E
- Nikon D800
- Sony EX1R (but not available for some of the shots)
- Olympus
- GoPro
The test shots shown below have been shot with Canon 5D Mark III with ISO 3200, 1/50 sec, f/8. For a baseline, we are currently in the process of shooting the same shots with the rest of the gear. Thereafter we can decide in which direction to proceed with further adjustments.
Shallow End of the Pool
The shallow end initially seems the easiest because there is more ambient pool light available. Since the water is shallow, the light will travel only a short distance in the water. However, one needs to calibrate the MWB very carefully, because warmer tones will make the water and tiling appear brownish, giving a mental association to uncleanliness…
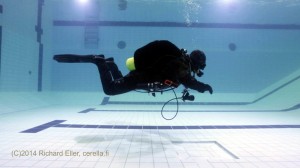
All pictures in this article are frame grabs from Full HD video and then reduced to smaller size, but, without any color adjustment (yet). The picture above was shot using manual white balancing from the top end of the ramp. The picture below shows the effect of using white balancing from the bottom of the ramp.
The first picture looks fresher, doesn’t it?
The following two pictures show the IKEA “colormap” with MWB from top of ramp and MWB from bottom of ramp.
In addition to the white balancing difference, you can see the effects of how the color map is held. If the colormap is held vertically, it will be lit mainly by indirect light. If you are attempting to estimate general exposure, the tilted version might be better, but, it is more difficult to repeat. Thus, it might be better to select fully vertical positioning of the color map.
The next two pictures show the reverse side of the color map, again with MWB at top of ramp and MWB at bottom of ramp.
The tones on the reverse side are very pale. Thus they are excellent for checking color resolution. With proper adjustments, you should be able to tell them all apart and find the color pairs on the map. Holding the reverse side is a bit more tricky. If kept fully vertical, the color will be shadowed through the plastic and appear much darker. For the pale exposure, one needs to tilt the sheet slightly in order to reflect light from above. Then you get the paler colors for comparison.
Deep End of Pool with Ambient Light
The deep end of the pool receives less light. Naturally, one could and perhaps even should compensate for this by adjusting exposure (e.g. iris). However, this would easily be another error source for continuity and repeatability if one would have to adjust this on each of the cameras multiple times during the pool session. Thus we are initially experimenting with a single exposure setting. The water in the deep end will appear darker, but, that is quite natural and expectable from the viewers’ point of view as well.
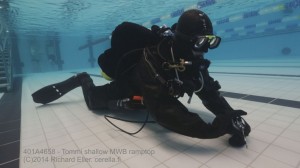
The challenge is that dark tones of diving suits become almost impossible to distinguish. This can be seen from the following two pictures (MWB top of ramp and MWB bottom of ramp).
The white balancing is more correct if one would use the white balance setting according to the bottom 1m2 of the ramp. Unfortunately, this setting will lead to a brownish cast in the shallow end.
The following pictures show the color maps (MWB top of ramp and MWB bottom of ramp).
And respectively the reverse sides of the color maps (MWB top of ramp and MWB bottom of ramp).
Deep End of Pool plus 4x80W NLS LED Lamps
In order to solve the problem of dark tone separation (i.e. diving suits appearing as black blobs), we experimented with adding four Northern Scuba Light 80W LED lamps each giving about 8000 lumens. Using a number of lamps also reduces the effects of shadows cast on the pool floor.
The following two pictures show the lit deep end from two distances.
Obviously for the actual shots, the lamps should be attached more uniformly…
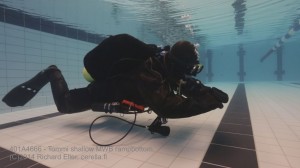
Now the diver shots look much better:
The above two shots were with MWB of bottom of ramp. The picture below uses MWB of top of ramp:
MWB from the bottom of the ramp gives more pleasing results here. However, then one would need to change MWB during the pool session. I.e. better results, but more work and more error prone.
Finally the color map
and the reverse side:
Conclusion
The technical experimentation is on-going. Next we are shooting the same test shots with multiple cameras. Then we should be able to estimate what settings will give over all the best results. Thereafter, we might proceed By slightly tweaking exposure and color balance in the settings of each camera…
Many thanks to Tommi Nukarinen who assisted in the video shots and acted as model.
The final picture below includes some color processing as well…maybe even too much? Opinions?
This post is also available in: Finnish





 English
 Finnish
No comments yet.